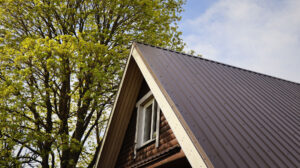
In recent years, metal roofing has become popular, rivaling traditional asphalt shingles for several good reasons. Not only are metal roofs durable and energy-efficient, but they also offer a sleek, modern look.One of the key advantages of metal roofing is its ability to withstand harsh weather conditions, from heavy rains to high winds. It’s also low-maintenance, long-lasting, and a smart investment for homeowners looking for both style and performance.When it comes to installation, hiring professional roofing contractors is essential. Understanding the installation process helps homeowners make informed decisions about materials and spot potential issues early on. This guide provides a quick overview of how metal roofing is installed.
Gather the Right Tools and Materials
You must have all the necessary tools and materials on hand before starting. Your roofing project will need the following:
Metal roofing panelsFasteners like screws or nailsRoofing felt or underlaymentDrip edgeFlashingMetal roofing screws with rubber washersMeasuring tapeMetal snipsLadder
The roofing company should use safety gear including gloves, goggles, and harnesses during the project.
Prepare the Roof Surface
The first step roofing contractors take is to ensure the roof surface is properly prepared. They begin by inspecting the roof decking and sheathing, and replacing any damaged sections to create a stable foundation. Next, they install roofing felt, which adds an extra layer of moisture protection before the metal panels are placed on top.
Add the Drip Edge
Next, roofers will install a drip edge along the roof’s perimeter. This metal flashing is designed to guide water off the roof, protecting the edges of the decking from water damage.The drip edge is first secured along the eaves, followed by nailing it along the sloped sides of the roof. Skilled roofers ensure the drip edge slightly overhangs the roof, allowing water to flow safely away from the house.
Prepare the Metal Panels
Metal roof panels come in standardized sizes, so roofing professionals will measure and cut them to fit your roof precisely. They ensure each panel is the correct length by trimming the panels to size. They use metal snips or a power saw, depending on the specific requirements of the project.
Install the Panels
Roofers begin by laying the first metal panel at one corner of the roof, securing it with metal roofing screws positioned in the raised ridges to prevent water seepage. The installation continues with each panel being placed side by side, overlapping the next by one inch. This overlapping technique ensures that water cannot leak through the seams, providing a watertight seal.
Place the Ridge Caps
Ridge caps are metal components designed to cover the seams at the peak of the roof. These caps are essential for preventing water from seeping into the seam. An experienced roofer will carefully position the ridge caps along the roof’s peak, ensuring they overlap the metal panels for optimal protection. The caps are then securely fastened with screws to complete the installation.
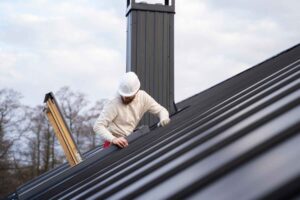
Install the Flashing
The flashing is one of the most critical parts of the roof system. This metal sheet covers the roof’s joints and ensures that water doesn’t seep into vulnerable areas, like chimneys or skylights.Roofing contractors place flashings around any opening. They’ll use them to cover any joints or areas where the roof meets a wall or chimney. The flashings are then secured with screws or nails, then a sealant is also added to provide another layer of watertight protection.Installing a metal roof looks daunting. You can do the job if you’re patient and skilled enough, but this is best left to a good roofing services company. They have the right tools, materials, and experience. It’s vital that you, as a homeowner, understand the installation process. This knowledge will help make sure the job is well done.